Sękacz - Tasty Polish Spit Cake
Copyright: Traditional Recipes

Sękacz - Tasty Polish Spit Cake

Published: - Last updated:

Jump to recipe

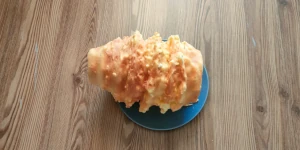
Hey food enthusiasts! Today, I want to talk about one of Poland's most renowned and iconic desserts - sękacz. This unusual baking with a characteristic structure and rich taste won the hearts of many cake lovers. I invite you to explore the history of sękacz. Let's discover its unique recipe and method of preparation and enjoy its unique taste.

Sękacz, is also known as "spit cake" or "tree cake". It is related to the German Baumkuchen, the Swedish spättekak, and closely related to the Lithuanian šakotis. This unique type of cake consists of simple ingredients. All you need is some butter, eggs, flour, sugar and cream. Its characteristic form imitates a tree with knots. The name "sękacz" actually comes from the Polish word "sęk", which means knot or burl in English.

The history of sękacz

The practice of baking layers of dough over an open fire, later became popular in Poland during the Polish-Lithuanian Commonwealth (1569-1791). But we can trace this tradition back to even earlier times. Similar to many aspects of European history, the concept originated from the ancient Greeks. Over time, different regions developed their own variants. What distinguishes them is their own technique of preparing and processing the dough.

According to one legend, Lithuanians and Poles inherited this delicacy. It was created by the Baltic Yotvingian tribe, which settled in Podlasie in the Middle Ages.

Over the years, Sękacz has established itself as a significant element of the gastronomic heritage of northern Poland. It is often eaten during family gatherings, weddings, or special occasions. Its inclusion on dining tables represents happiness, hospitality, and longstanding customs. Additionally, it is commonly chosen as a cherished present for loved ones to commemorate diverse celebrations.

How to prepare Sękacz?

Special equipment is necessary for baking the cake. It includes a unique wooden roller made of oak, which is wider on one side and narrower on the other. The process also requires a stove with a specific oven designed for baking this type of cake. This specialized oven is equipped with a firebox or electric heat source along with supports called grates. The roller rests and rotates on these grates. Below the cylinder, there is a metal spoon, called a ladle, from which the prepared dough is poured onto it. It is scooped from the bottom using another ladle-like tool called a "spoon". The fireplace itself is located adjacent to these elements.

Preparing the dough can be relatively simple, but time-consuming. Baking is more challenging and takes a lot more time. In total, it is about 4-5 hours. About three hours are dedicated to working at high temperatures near the hot stove.

Creating such an elaborate structure within home settings proves exceptionally challenging. However, there exist some individuals who have accomplished this task.

Recipe informations:

timer

Preparation

30 minutes
access_time

Total

230 minutes
soup_kitchen

Yield

Servings 2
4 (1)

Ingredients

  • 10 fresh eggs
  • 250 ml of cream
  • 250g of flour
  • 250g of sugar
  • 250g of butter
  • juice of 1/4 lemon
  • 1 vanilla sugar

Steps

1. Step

Beat the butter with the sugar and vanilla sugar until all the sugar is completely dissolved. Separate the yolks from the whites. Set aside the whites and add the yolks to the previously creamed butter with sugars.

2. Step

Before adding the flour, it is advisable to sift it through a sieve first to make sure that there are no lumps in it. Then slowly add the flour and mix until a uniform consistency is obtained.

3. Step

Add the cream to the dough and squeeze the lemon juice. If you want, you can add some additional aroma right now, but in my opinion, the cake itself is delicious and fragrant.

4. Step

Now we can start whipping the whites. To help this process, we can add a pinch of salt to the proteins. Once we have the proteins well whipped, we can gradually add them to the dough, thus mixing them. The whipped egg whites make the dough fluffy and delicate.

5. Step

Once the oven is preheated, we can move forward with covering the rolling pin using parchment or baking paper. Afterward, we secure the parchment onto the roller by tightly tying it with a cotton string for better adhesion. The subsequent action involves coating the parchment with butter to facilitate its removal later on and separate it from our sękacz dessert.

6. Step

Once we have the roller prepared, and the oven is at the right temperature, we can proceed to heating the roller. We put our roller on the grate and spin it, heating it up so that its surface is warm enough. Be careful not to burn the parchment. This is a very important process because the first layer must be baked well so that later it does not turn out that it will fall off the roller.

7. Step

Then, pour some batter onto the baking sheet. scoop and, using a spoon, spread the dough evenly on the rolling pin so as to create a thin layer, which we bake lightly. You have to be careful not to burn the cake, which is easy. When the temperature is too high, move the roller away from the fire. This is what we use to regulate our grate.

8. Step

Roll the roller and after the mass is slightly concentrated, pour the next layers, choosing the roller rolling technique accordingly. When turning uniformly in one direction, a barbed tree trunk is outlined. Next, bake the next layers and pour them and twist them to form knots (spikes) and so on until the cake is finished. I will say that this is not a technologically easy process. You have to learn how to spin the roller properly to get the desired effect, and at the same time not burn the dough and get beautiful knots. In the production of sękacz, its quality is influenced by two parameters: the dough and the twisting technique.

9. Step

As soon as the whole cake disappears from the scoop, we can put the tree cake on a stand to harden it in a horizontal position. Next, we remove it from the roller and place it on the table. Then, we carefully take off both the parchment paper and string that are wrapped around its center. The last stage that remains for us is to cut it and consume it - enjoy.